Categories
Batcher

Download Order Receipt

Categories
Batcher

How To Close A Batch Plant

Categories
TWC

How to Sign off an Order

Login as the TWC User:
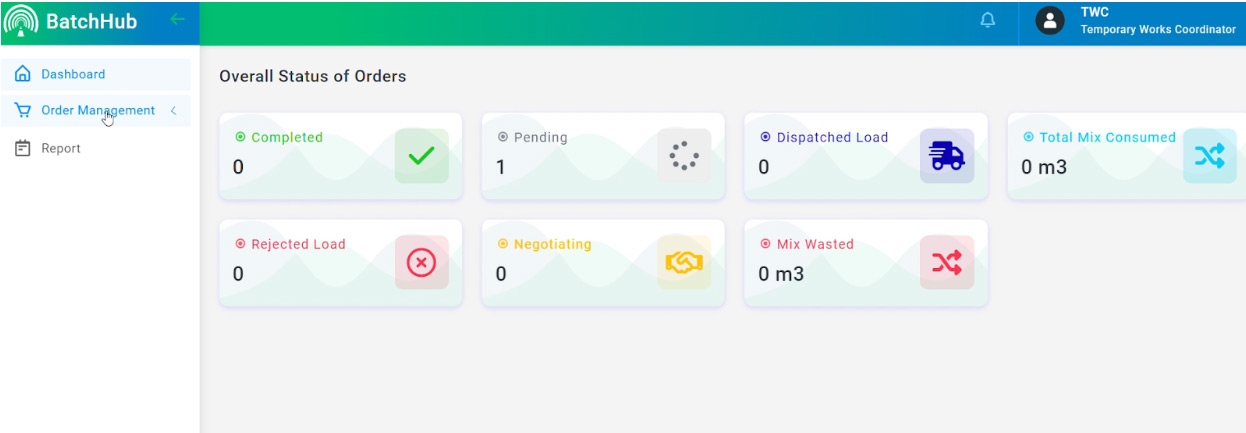
Access the Dashboard.

Navigate to the List Order Management Menu on the Left Hand Side Panel.

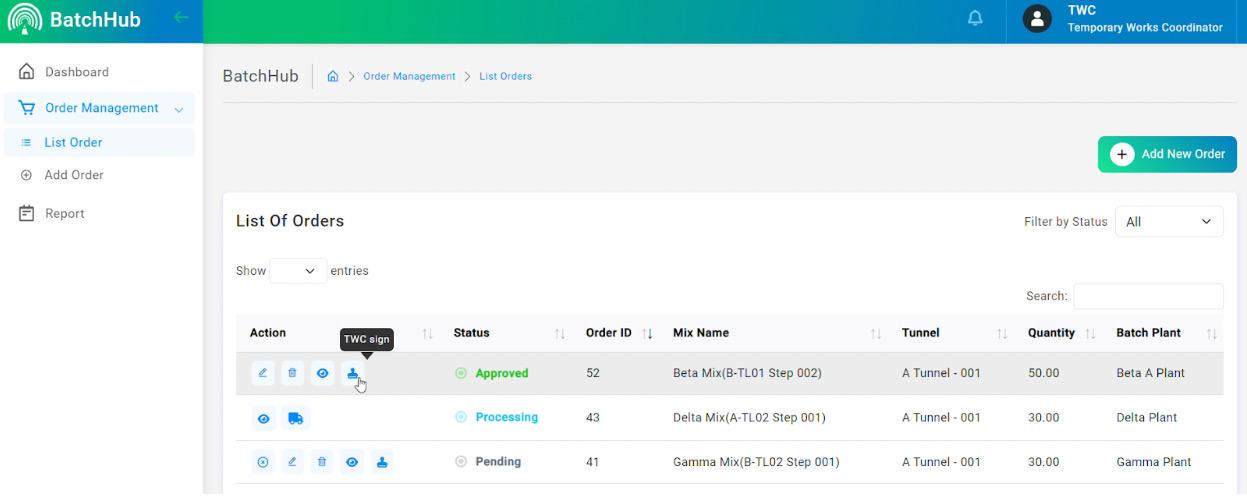
Select the List Order Menu.
You will be directed to the Order Listing Page.

  • Locate the Listing with a Stamp Icon.
  • LClick on the Icon to approve the Order as the TWC.
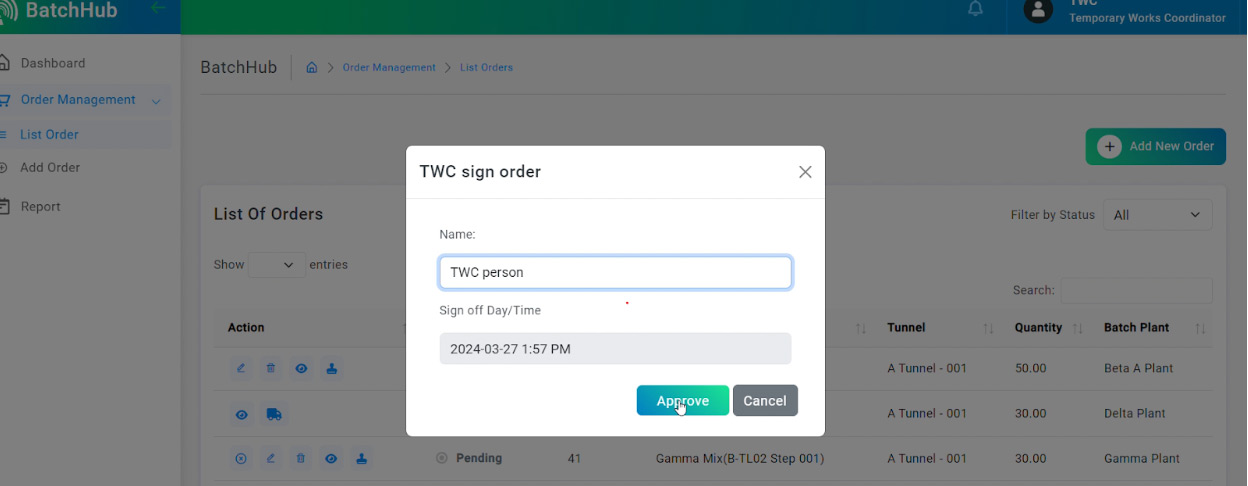
  • A Popup will appear.
  • Enter your name and click on the approve button.
  • You have successfully approved the Order as the TWC.
Categories
gobel Tunnel Engineer

Step 1 – How to Login

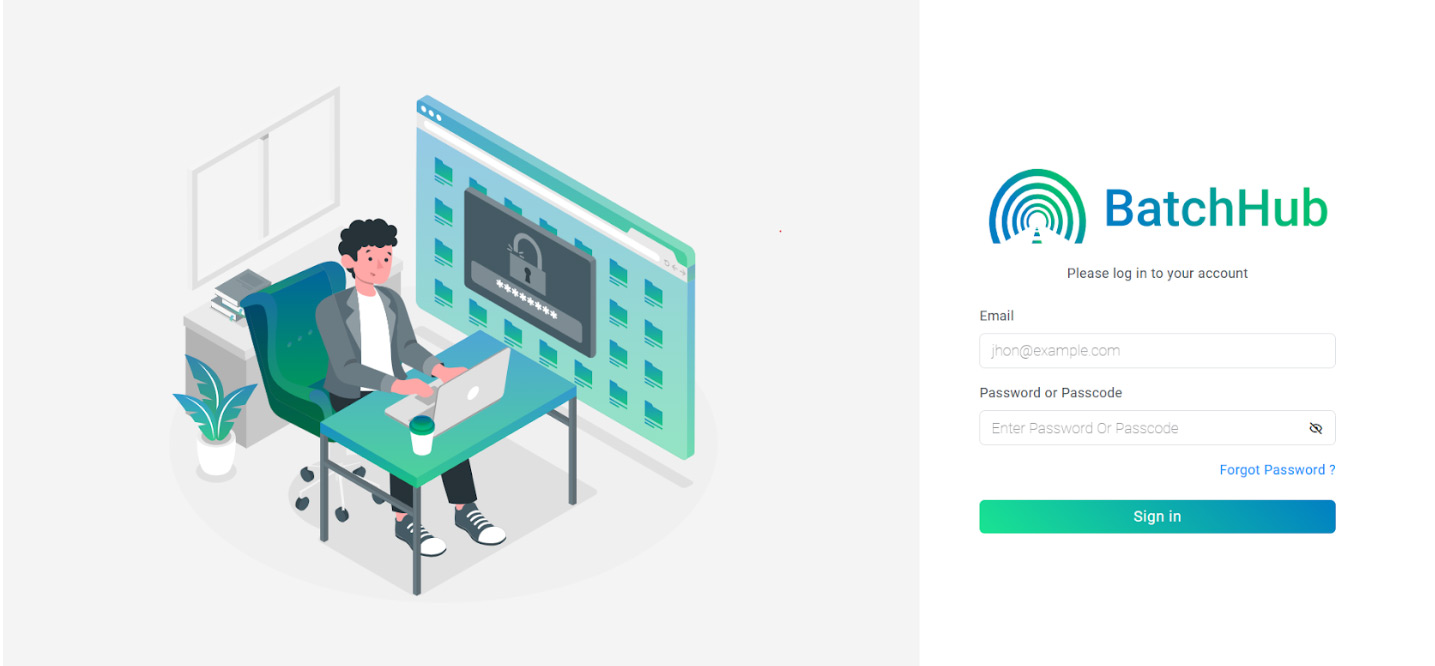
To log in to the system, please visit www.batchhub.com and you will be directed to the Login Screen.

  • Enter your email address in the “Email” text field.
  • Enter your password.
  • Click the “Sign in” button.
  • This action will lead you to your Dashboard.
Categories
QA

Step 02 – How to QA Approve an Order

  • To approve a load, please log in using your credentials.
  • After logging in, you will be directed to the dashboard.
  • The orders awaiting approval can be found on the Order Listing Page, accessible from the Order Management Menu in the Left Side Panel.
  • Notifications for dispatched loads can be viewed by clicking on the Bell Icon on the top right of the page.
  • In the Order Listing page, the dispatched loads will be displayed in the Dispatched Loads Grid. Each listing will have a “Tick” Icon and an “X” Icon. Click on the Tick Icon to approve the order or on the “X” Icon to reject the load.
  • Once the load is approved, the Tunnel Engineer will receive a notification confirming the approval, and they will be able to complete the process from their side.
Categories
Tunnel Engineer

Step 2 – How to Create an Order?

To create an order, you must be the Tunnel Engineer, TWC, or Tunnel Manager. Follow these steps:

1. Log in using your email address and password. Refer to the “How to Login” section for details.

2. Once logged in, you’ll be on your Dashboard.

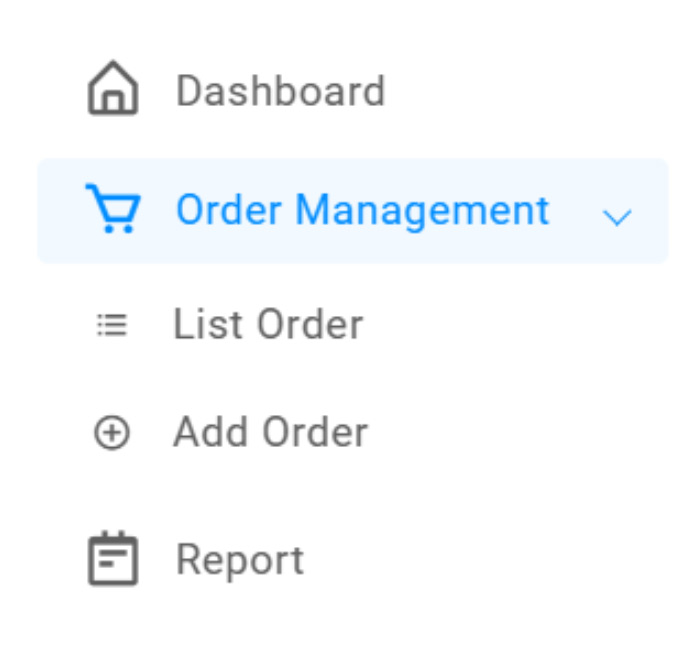
3. Locate the “Order Management” menu item and click on it. This will open two additional submenu items.

4. Click on the “Add Order” submenu item.

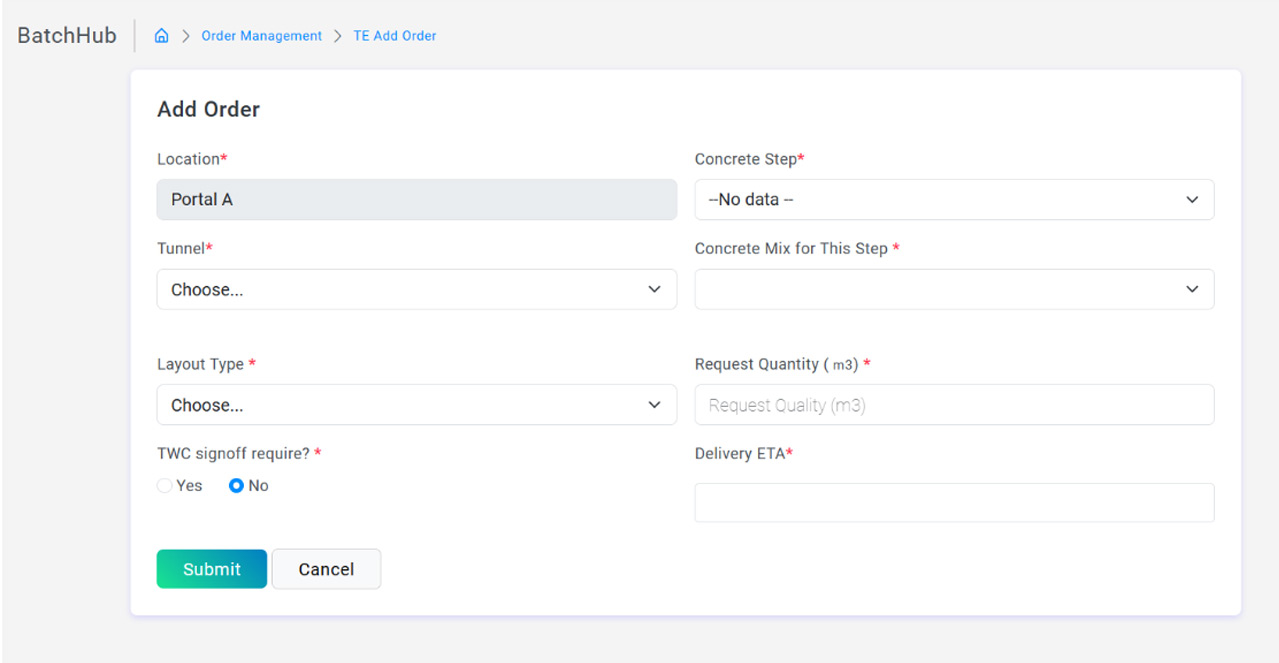
5. You will be navigated to the “Add Order” page.

o create an order, follow these steps:

1. Select the appropriate options based on your requirements.

2. The location will be auto populated for the Tunnel Engineer and selectable for a Tunnel Manager.

3. Select the tunnel, which is a mandatory field.

4. Select the layout type from the dropdown menu, also a mandatory field.

5. The next option is not mandatory; select “Yes” or “No” based on whether this order needs to be verified by the TWC.

6. Select the concrete step.

7. Select the mix that is suitable for the step.

8. Enter the quantity of the mix you need.

9. Choose an estimated time of arrival, indicating when you expect the order to be delivered to your location.

10. Once all these options are selected, click “Submit.”

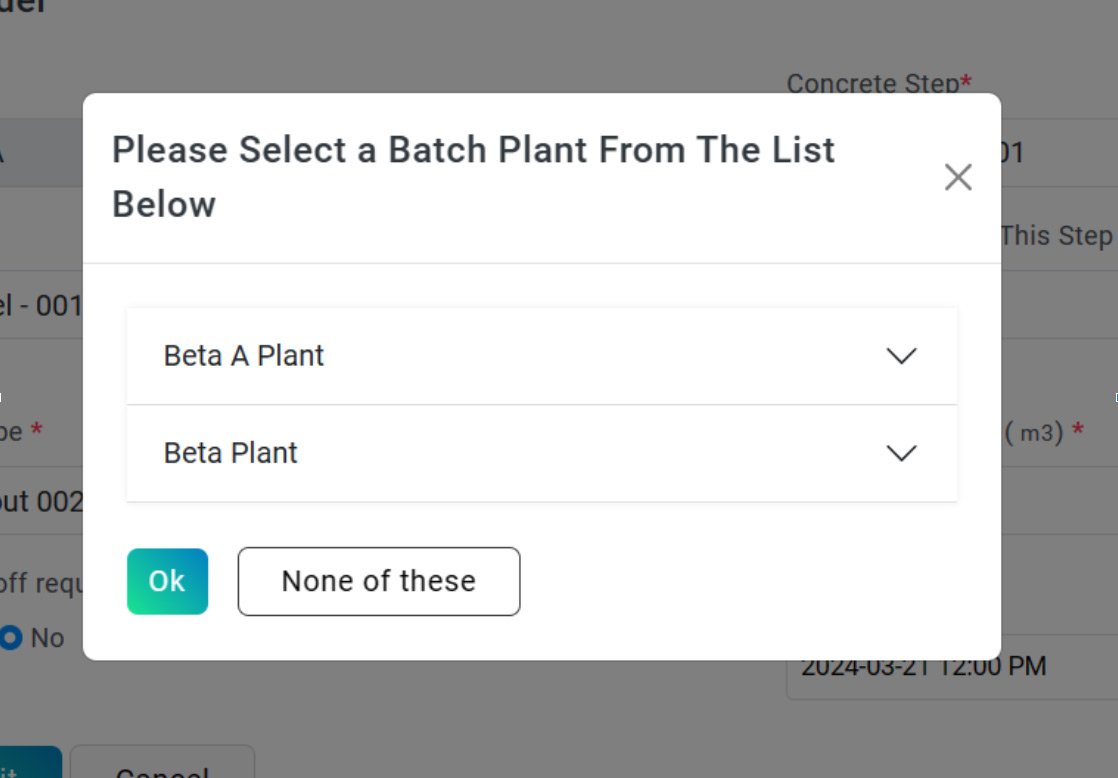
After selecting your options and clicking “Submit,” the system will check all available batch plants that process the requested mix and list them in the FORECAST WINDOW.

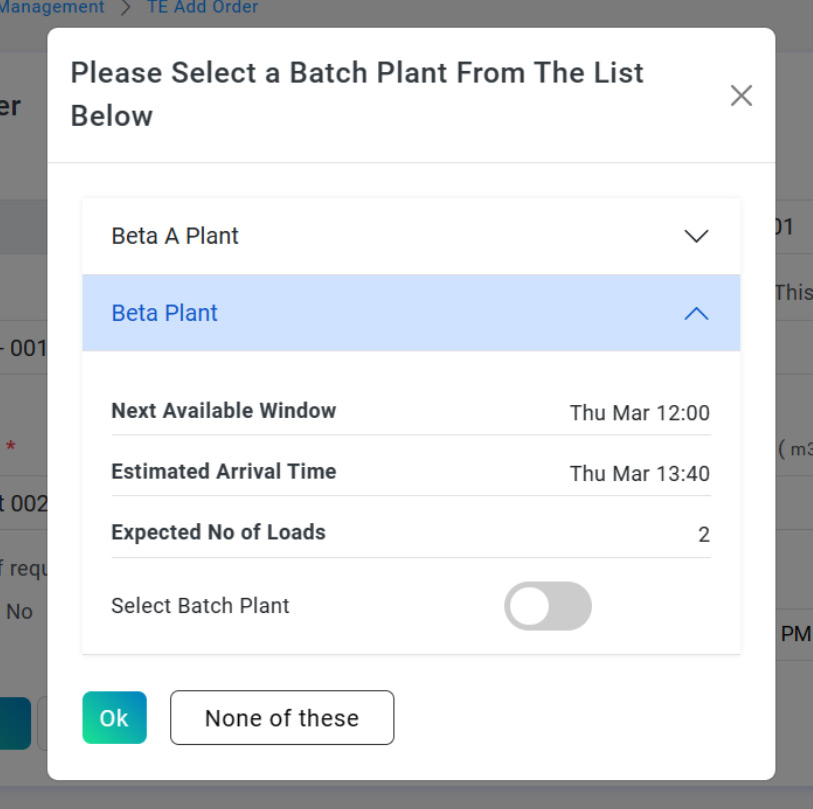
In the FORECAST WINDOW, you can click on the arrow marks next to each plant to view more details. Clicking on the arrow will open a window showing:


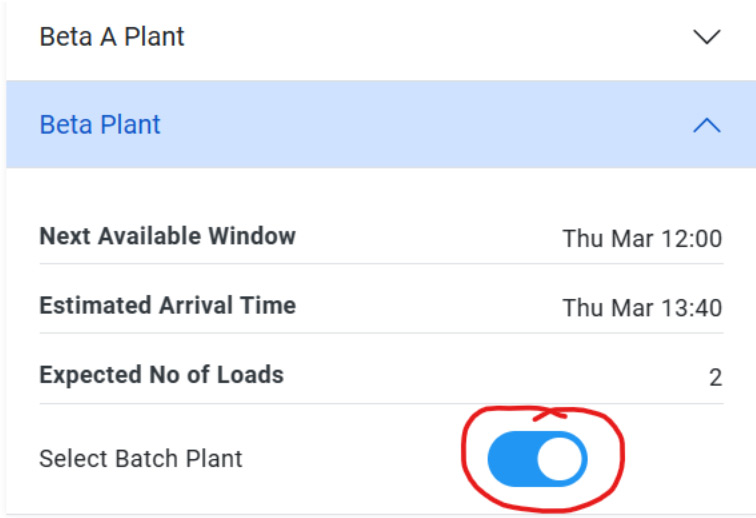
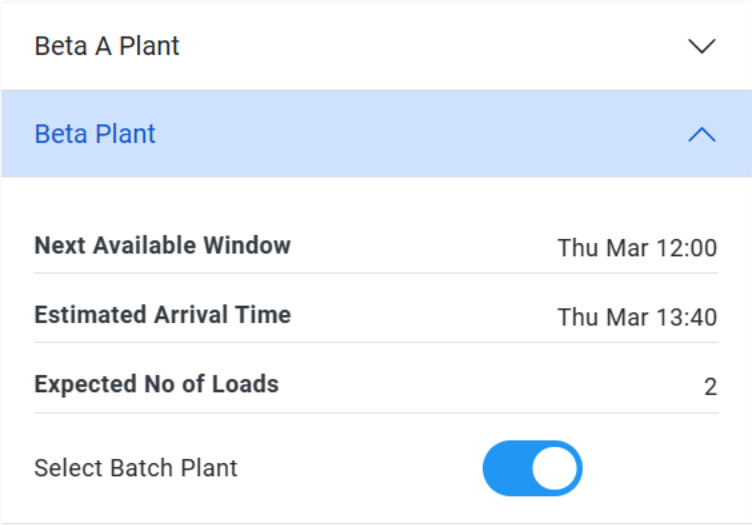
– The next available window of that BETA PLANT

– The estimated arrival time of the load if you select that plant

– The estimated number of loads based on the quantity you have requested.

To Select a  Batch plant, you need to click on the Switch

You have two options:

1. If the batch plants displayed meet your requirements, you can select one and then click the “OK” button. The order will be sent to that batch plant.

2. If none of the shown batch plants meets your needs, you do not have to select any batch plant. Simply click on the “None of these” button. The order will still be placed but will be sent to Central Control. You will need to communicate with them manually, and they will assist you with your order.

Categories
Batcher

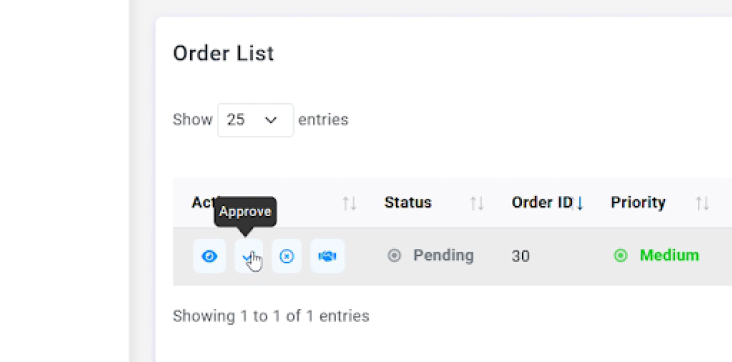
Step 02 – How to Approve an Order

To approve an order, log in as the Batch Plant Manager.

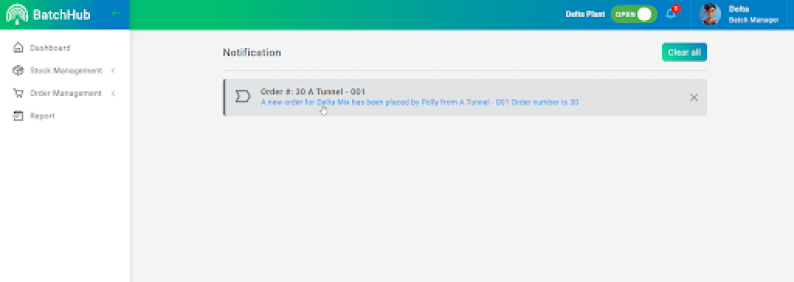
If there’s a new order, you’ll see a notification bell icon at the top right. Click it to view the notification.

To view the order, go to the Order List section. Access it by clicking the Order Management Menu on the left.

To approve the order, click the “Tick” icon.

Categories
Batcher

Step 03 – How to Process an Order

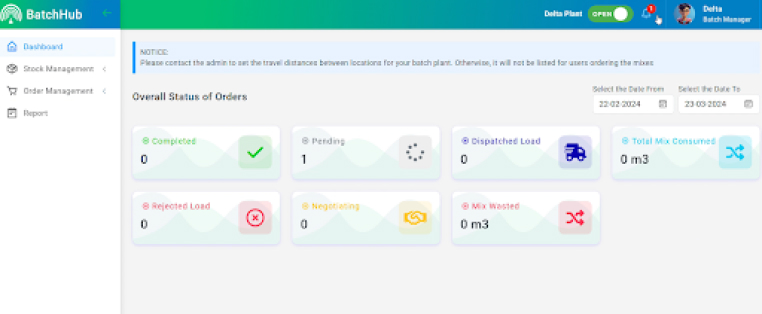
To process an order, log in as the Batch Plant Manager and access the dashboard. Check the Order List for any orders in Approved status, as processing can only be done at this stage.

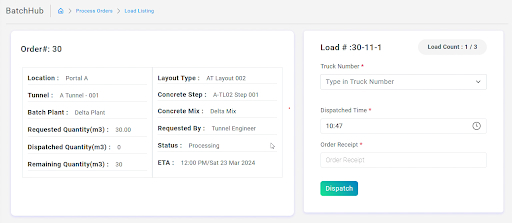
In the list, you’ll find a “clock” icon next to each “Approved” order. Click on this icon to begin the processing. This will take you to the Processing Page.

On the Processing Page, you’ll dispatch the load. The number of loads depends on the quantity ordered by the Tunnel Engineer. For example, if the requested quantity is 30 cubic meters, the system divides it into 3 loads, each considered to be 10 to 11 cubic meters.

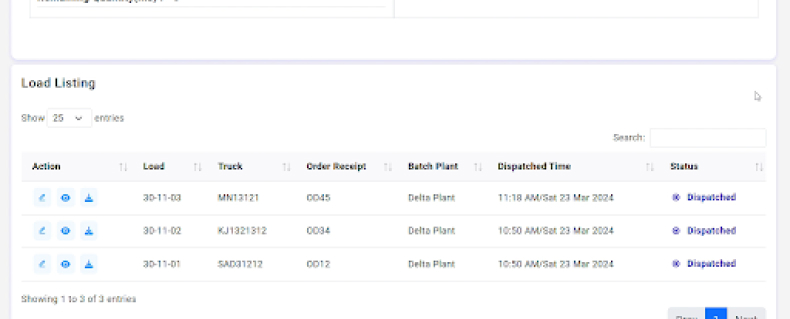
Select a truck, set the dispatch time, and enter the Order Receipt number for each load. Click Submit, and the load will be saved in the grid below.

The count of the load will be shown in the top right corner of the box. Repeat this process two more times to dispatch all the loads.

Once all loads are dispatched, the box in the right will disappear, indicating that there are no more loads to dispatch. This is how you dispatch loads for an order.

Categories
Batcher

How to Reject an Order

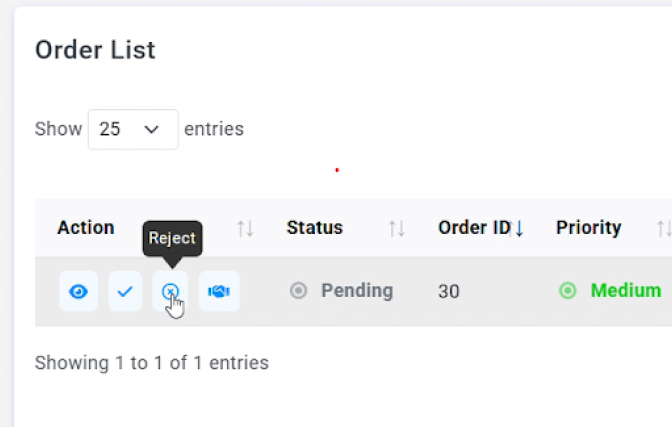
To reject an order, log in as the Batch Plant Manager and access the dashboard.

Check the Order List for any orders in pending status, as rejecting can only be done at this stage.

In the list, you’ll find a “Cross” icon next to each order. Click on this icon to reject the order.

Categories
Batcher

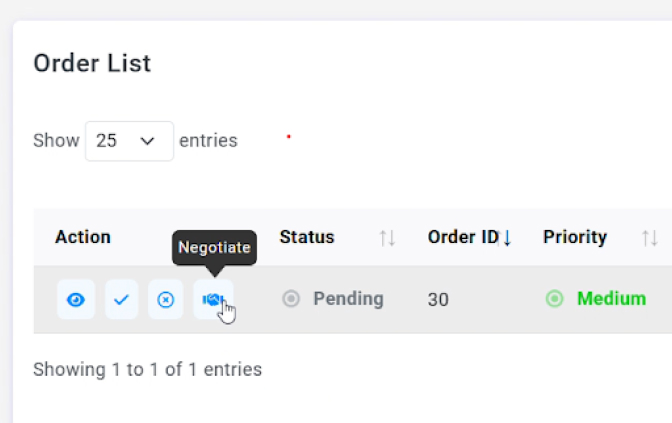
How to Negotiate

To negotiate an order, log in as the Batch Plant Manager and access the dashboard. Check the Order List for any orders in pending status, as negotiation can only be initiated at this stage.

In the list, you’ll find a “handshake” icon next to each order. Click on this icon to start the negotiation process.